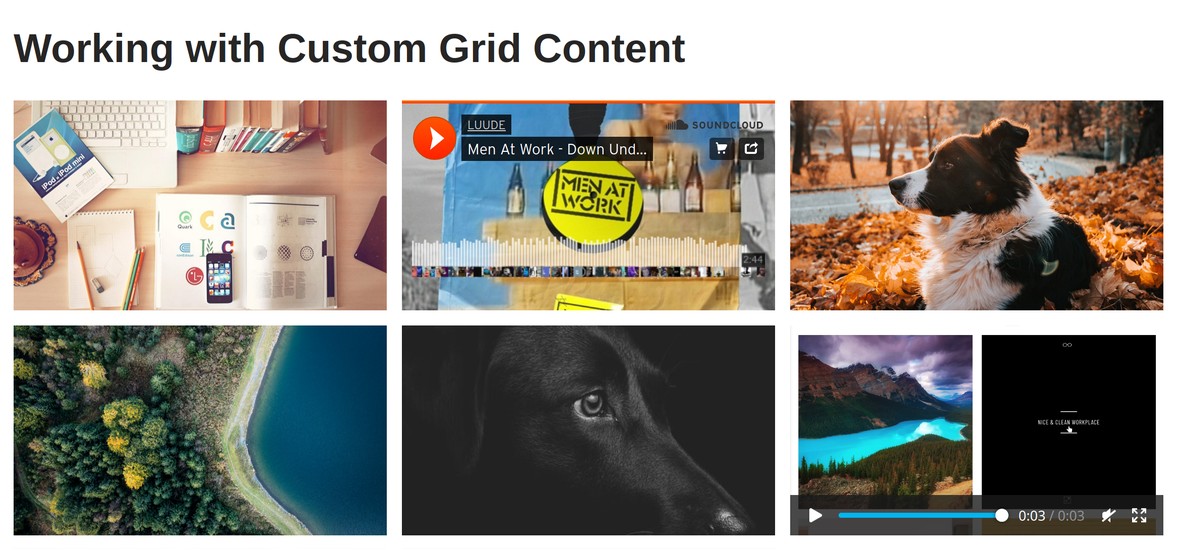
Working with Custom Grid Content
Learn how to configure a grid to use specifically selected pieces of content.

Table of Contents
Using Individually Selected Content Items
Rather than your grid containing dynamic content from your site or social media, you may instead wish to specifically select each individual item that appears.
You can do this using the Custom Grid grid source type.
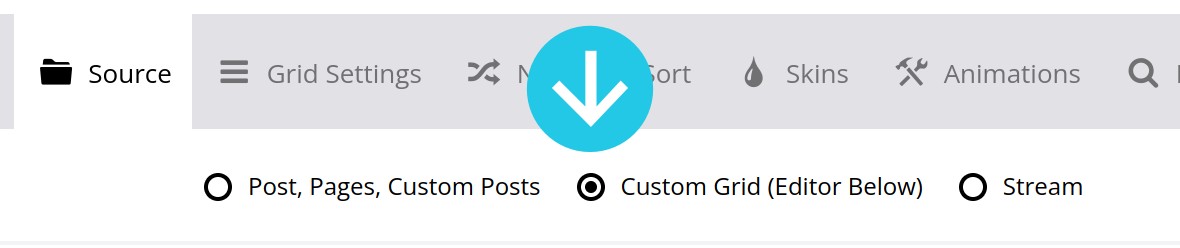
To begin, go to the Source panel and set the Based on option to Custom Grid (Editor Below):
Once you’ve made this selection, if you scroll down to the Add Items panel you will see seven buttons, each representing one of the types of content you can use in a custom grid:

Those types are YouTube, Vimeo, Self Hosted Media, Image(s), Sound Cloud, Simple Content, and Blank Item.
Let’s first take a look at how to add items to your custom grid, and then check out how to use each of the seven types of content.
Adding Items to a Custom Grid
There are two ways you can add items to a custom grid.
The first is to click any one of the seven buttons in the Add Items panel:

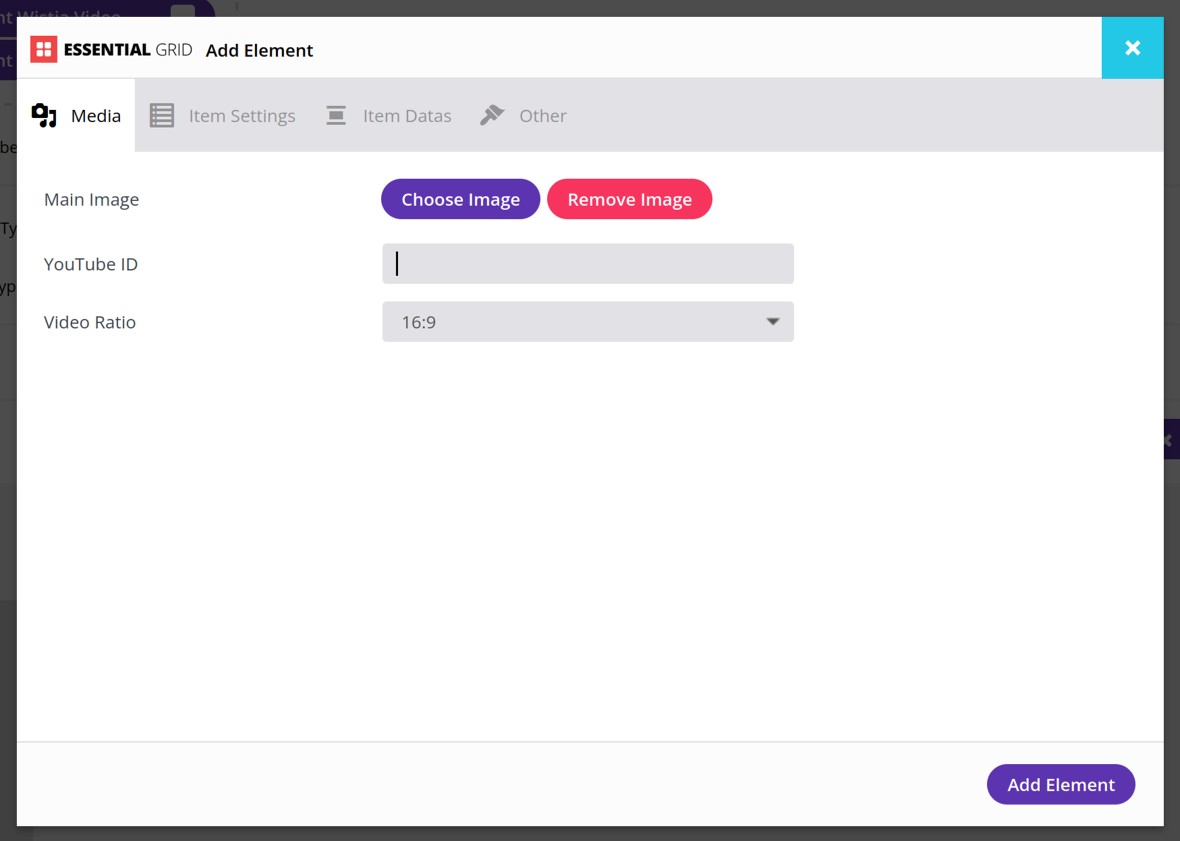
A dialogue box labelled Add Element will appear, where you can configure your content item. We’ll cover how to configure each type of content item in just a moment.
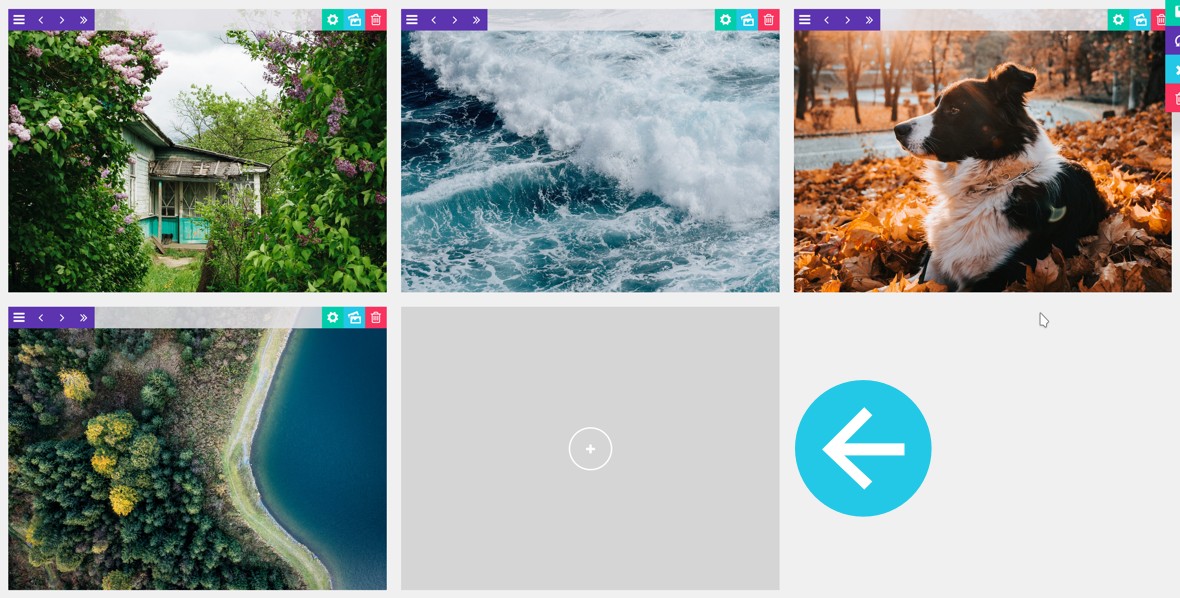
After you configure and add your item you’ll see it appear in the grid preview below:
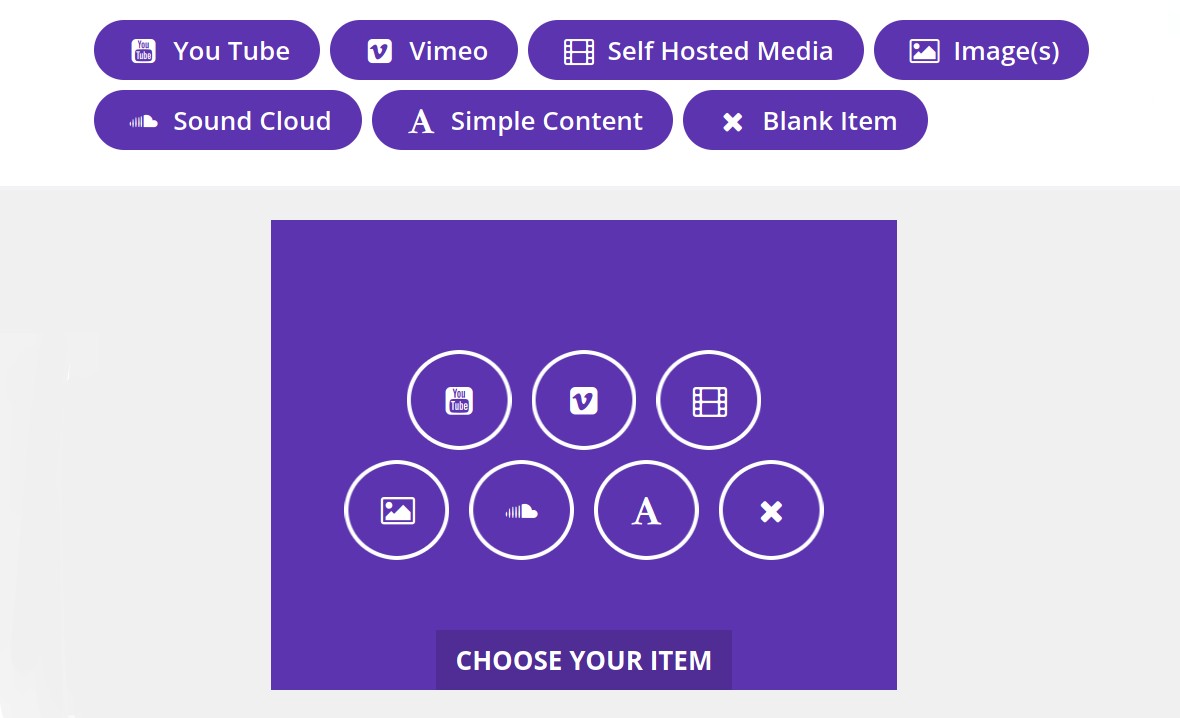
The second way to add an item is to hover over the gray square/rectangle you see at the end of your grid preview:
A purple overlay will appear labelled “CHOOSE YOUR ITEM”, with a button for each of the seven content items. Click one of those buttons to add a new item:
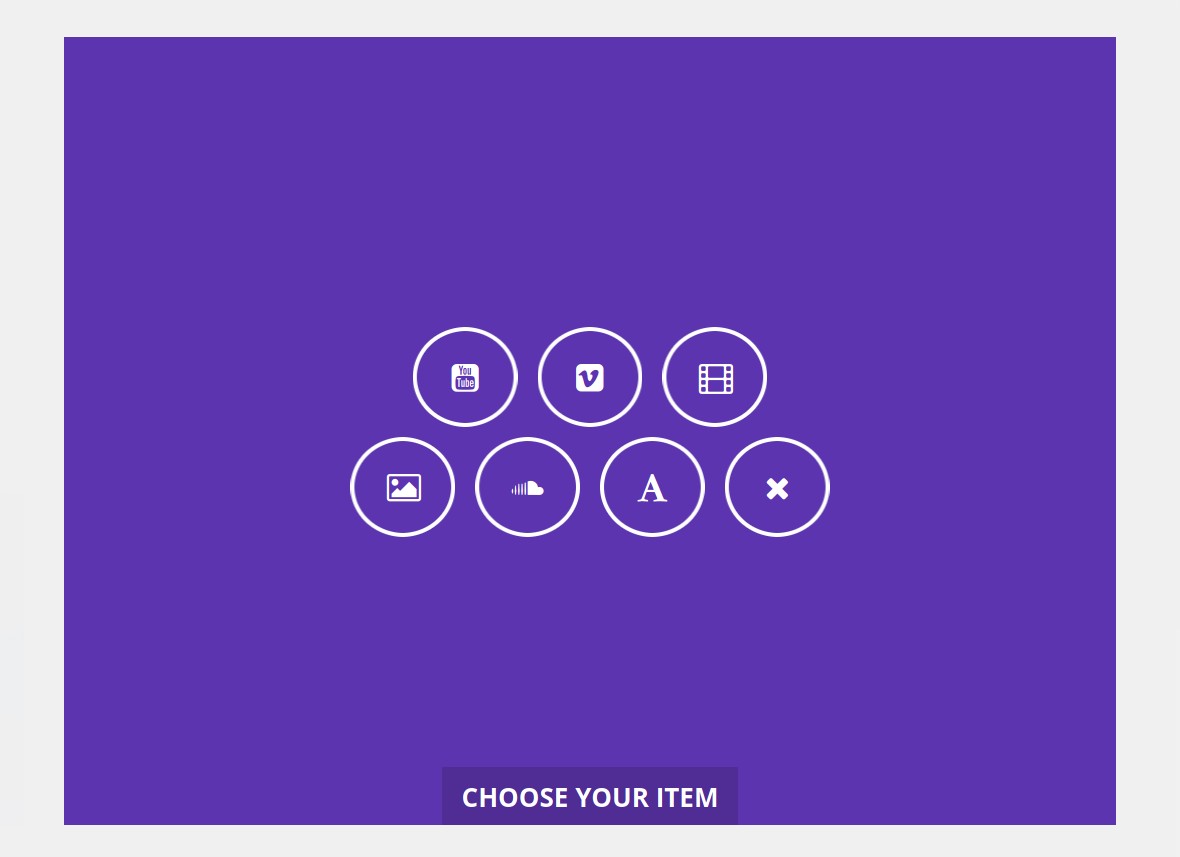
If you’re not sure which of these buttons is which, the icon on each matches the corresponding icon in the Add Items panel, so you can look at those for reference:
Custom Grid Content Types
Now that you know how to add grid items, let’s have a look at each of the seven types of content and how to configure them.
YouTube
The YouTube item type allows you to insert a specific video from YouTube.
To add a YouTube video first find its ID. The easiest way to do this is usually to visit a YouTube video in a browser, and then copy the string of characters that appears in the URL bar after watch?v=

Then, after adding a YouTube item to your grid, insert that ID into its YouTube ID field:

Optionally, click the Choose Image button to browse for and set a custom thumbnail image to appear in the grid:

Then click the purple Add Element button at the bottom right:

Adding Media Source Types
After adding a YouTube video item, by default you won’t actually see the video if you preview your grid or add it to a page. Instead you’ll see either an empty space, or a thumbnail if you’ve set one:
The reason for this is because a little extra configuration is needed of what we call Media Sources.
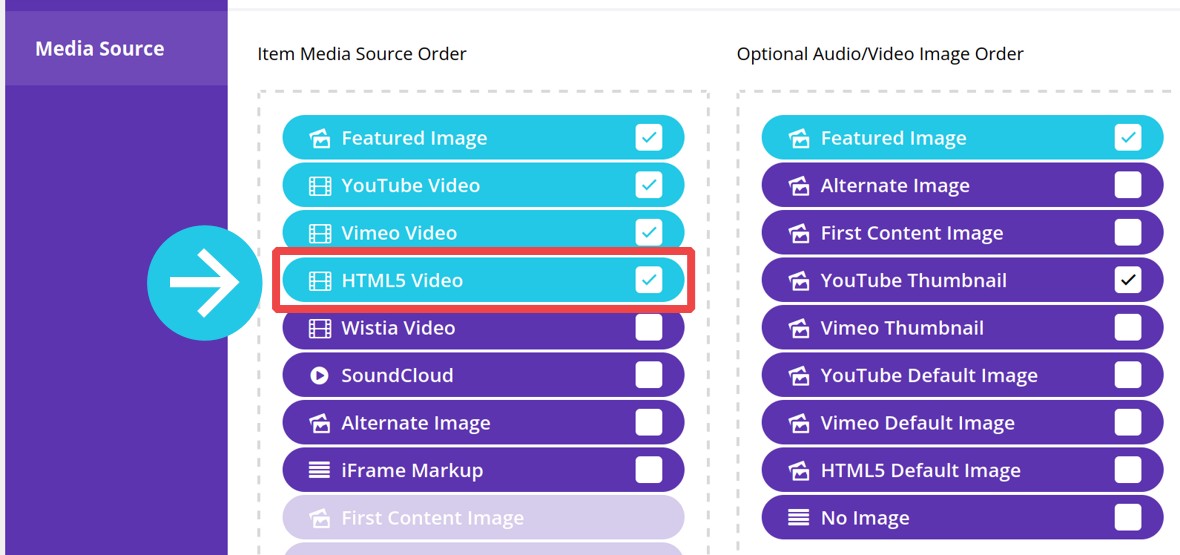
Media Sources are the types of media that are allowed to appear in a grid, e.g. featured images, YouTube videos, HTML5 videos, iFrames, and so on.
By default in a newly created grid, the only type of media that is allowed is a featured image. So when we want to add additional types of media we need to enable those extra types.
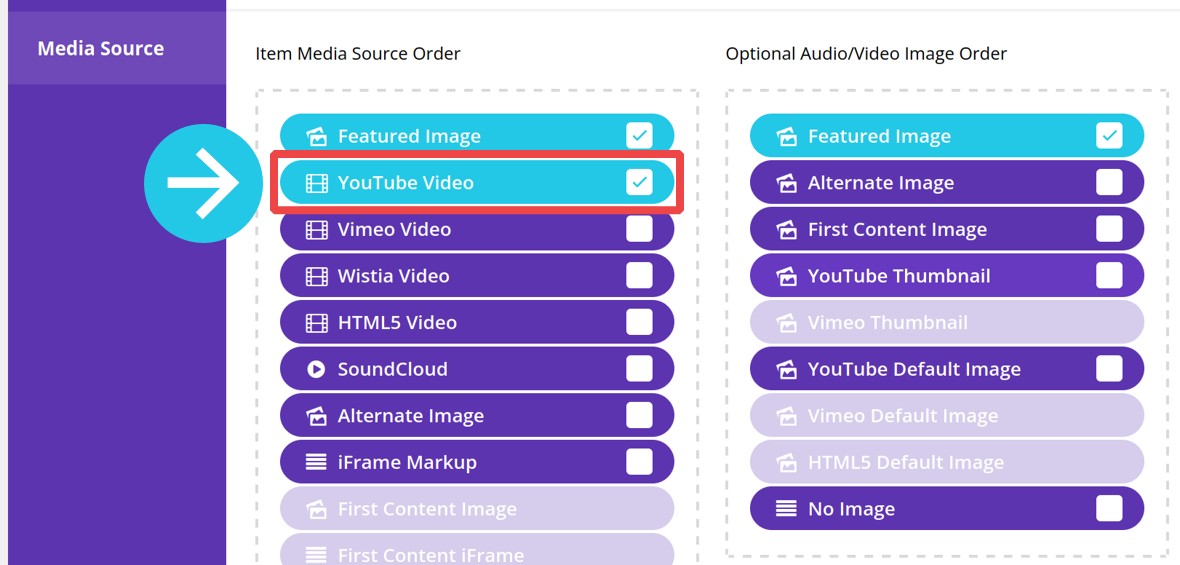
So to make your YouTube videos appear, scroll up to the Media Source panel, look in the Item Media Source Order column, and tick the box labelled YouTube video:
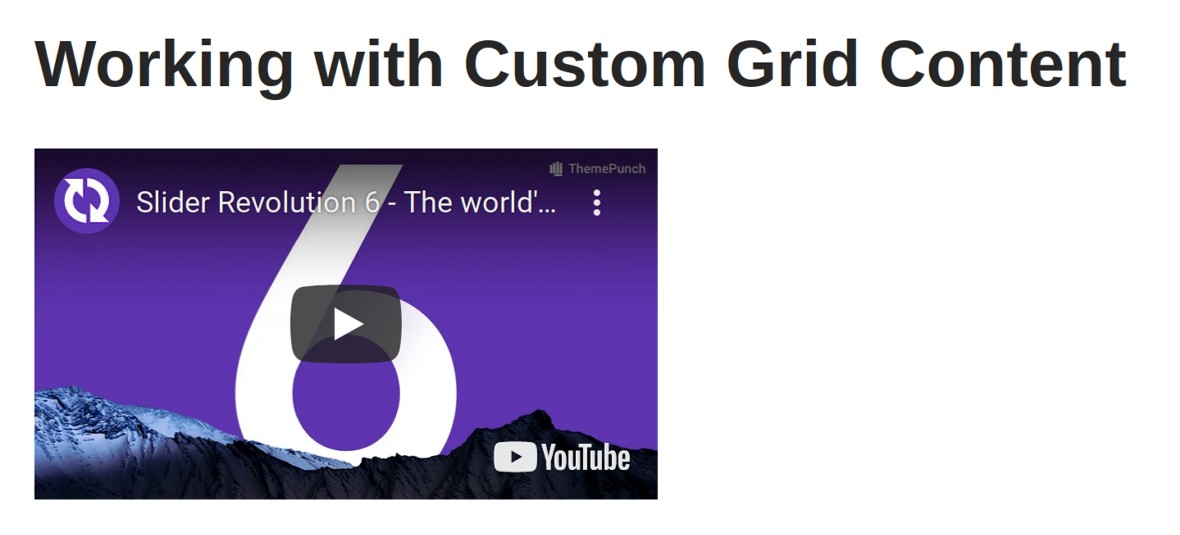
Now your YouTube videos will appear in your grid:
Additionally, if you wish, you can also look under the Optional Audio/Video Image Order column and check the YouTube Thumbnail box to fetch the video’s thumbnail image.
Setting Media Source Preference Order
In case there might be multiple possible media sources available for a given grid item, you can set which should be preferred by dragging and dropping checked media sources to change their order in the stack:
Essential Grid will first try to display whichever media source is at the top of the stack, then if nothing is found it will look for the second preference, then the third, and so on.
Vimeo
The Vimeo item type is almost exactly the same as the YouTube item type only, as you would expect, you can use it to display a single Vimeo video.
Once again, the first step is to get the ID of the video you want to display. Go to the page of the video you want to use and in the browser copy the series of digits that appear after vimeo.com/

After clicking one of the buttons to add a new Vimeo video, paste the video’s ID into the Vimeo ID field of the Add Element pop-up, then click the Add Element button:

Now we have to add a new media source, just as we did when adding YouTube video.
In the Media Source panel, check the box labelled Vimeo Video, and optionally the box labelled Vimeo Thumbnail:

Your grid should now have a Vimeo video displaying within it:
Note that by default Vimeo videos don’t have any inline controls, so in order to allow visitors to play the video you may also wish to switch into the Grid Settings tab:
Then look for the Media Playback subsection, and switch Use Controls Inline to Enable:
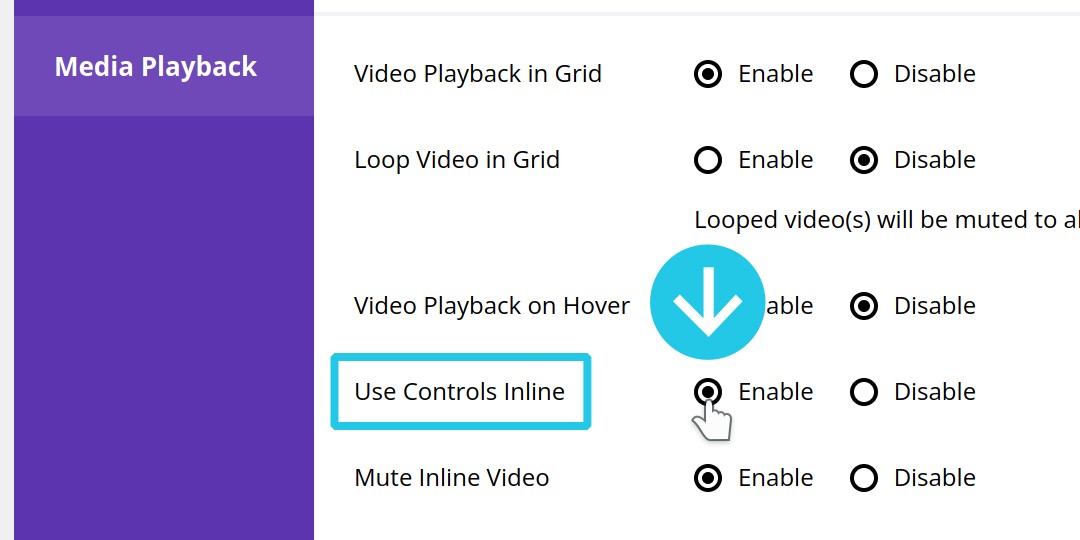
Now your video will have controls available:

Self Hosted Media
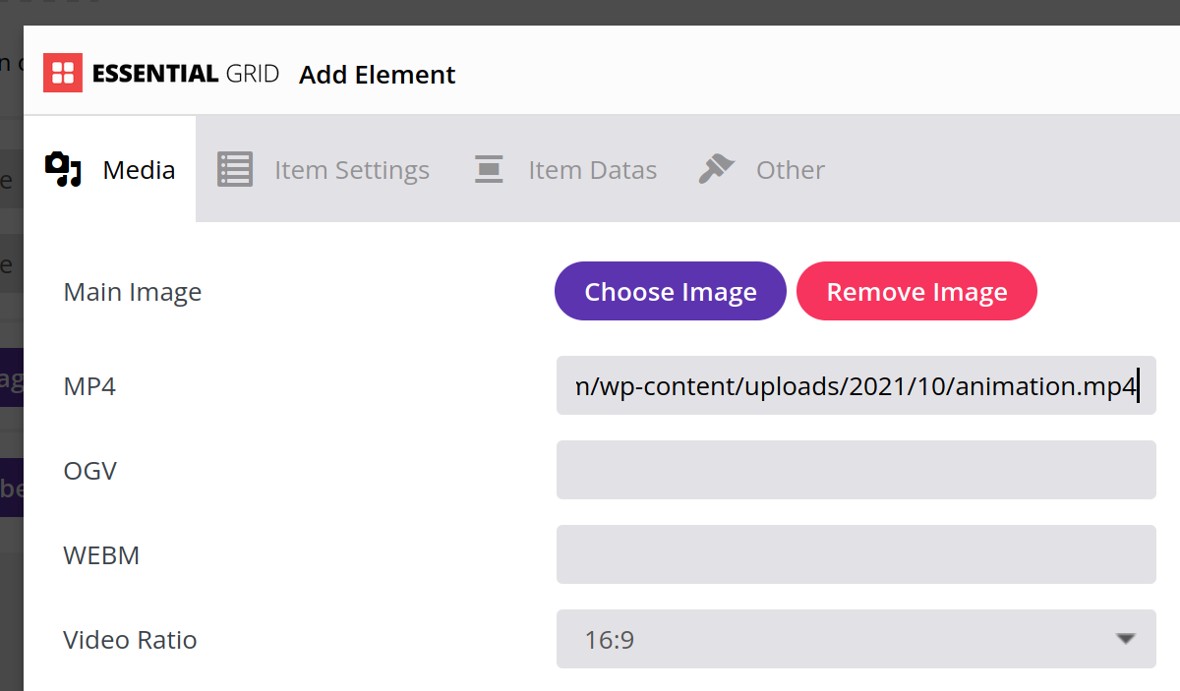
The Self Hosted Media item type allows you to display MP4, OGV and WEBM files you are hosting yourself.
Before using this content type you will need to have uploaded your media to your own hosting, and have its URL ready for use.
After adding a self hosted media item to your grid, paste the URL of your media item into the field that corresponds with its file type, then click the Add Element button:
In the Media Source panel, check the box labelled HTML5 Video so your video will show:
As with Vimeo videos, self hosted media does not show controls by default, so for this type of content you may also wish to enable inline controls:
Image(s)
The Image(s) item type allows you to add images from your media library to your grid.
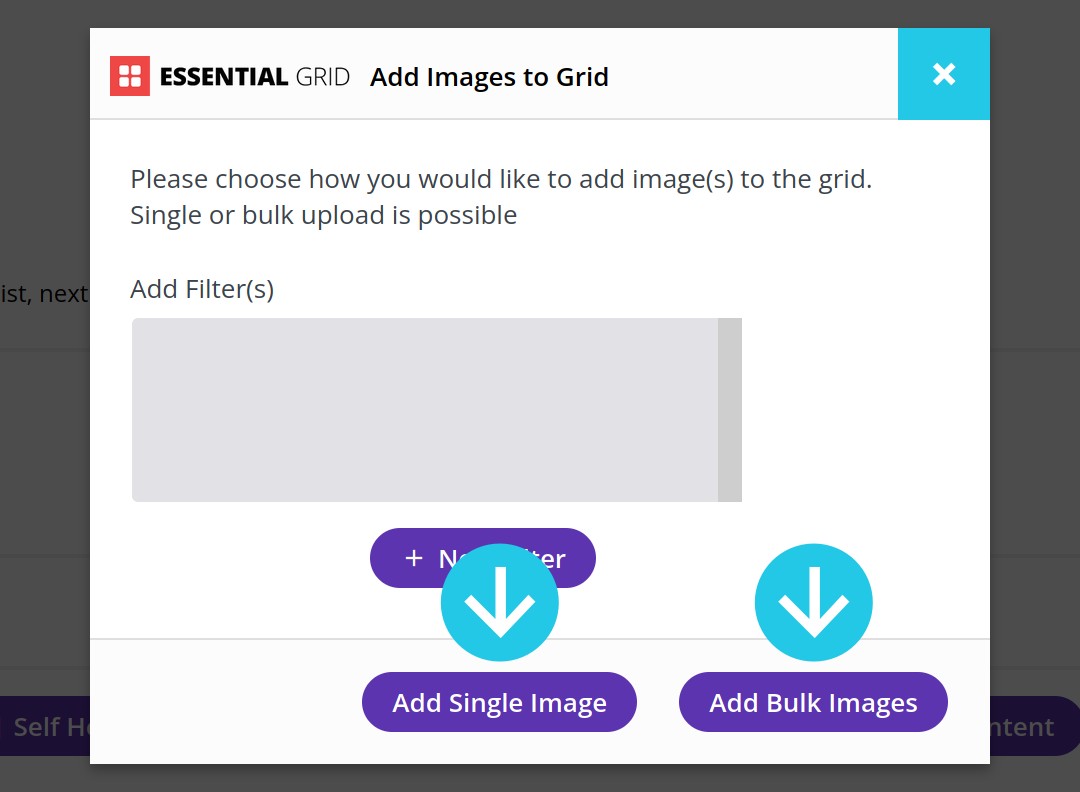
After clicking one of the buttons to add image items, a box labelled Add Images to Grid will appear, from which you can choose either the Add Single Image or Add Bulk Images button:
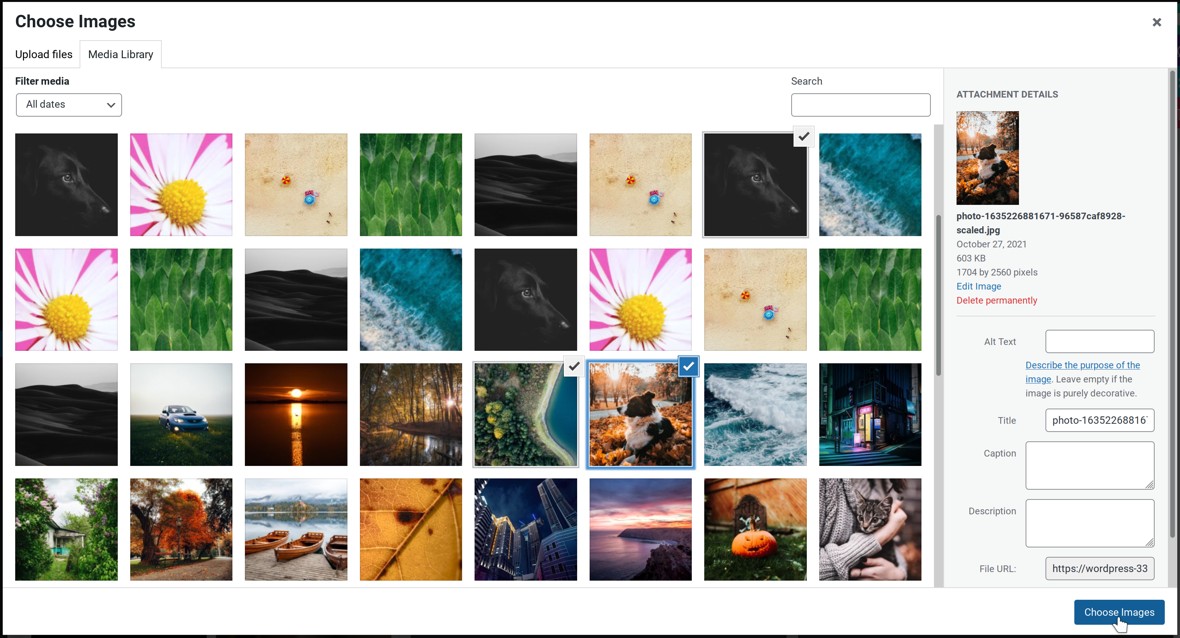
The WordPress media library will open up. Click the image you want to use, and if you’re adding bulk images hold down your CTRL / CMD key and select additional images. Then click the Choose Images button at the bottom right corner:
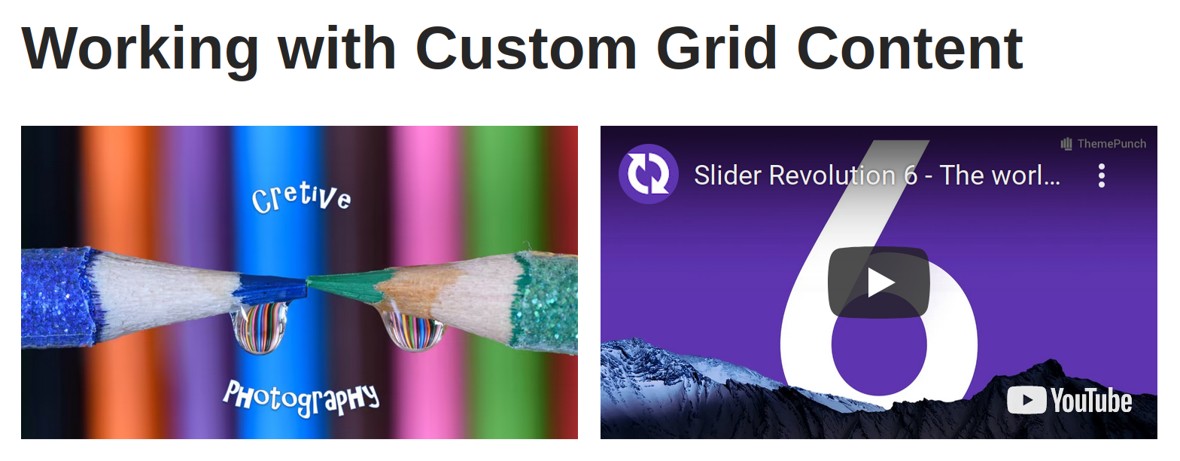
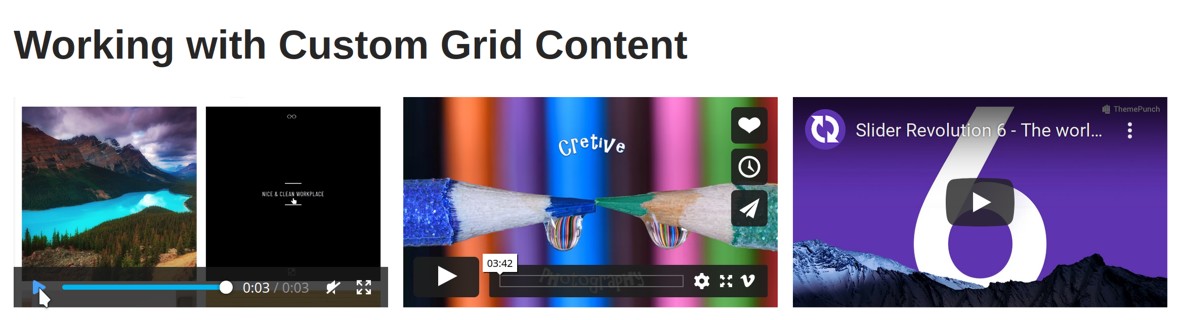
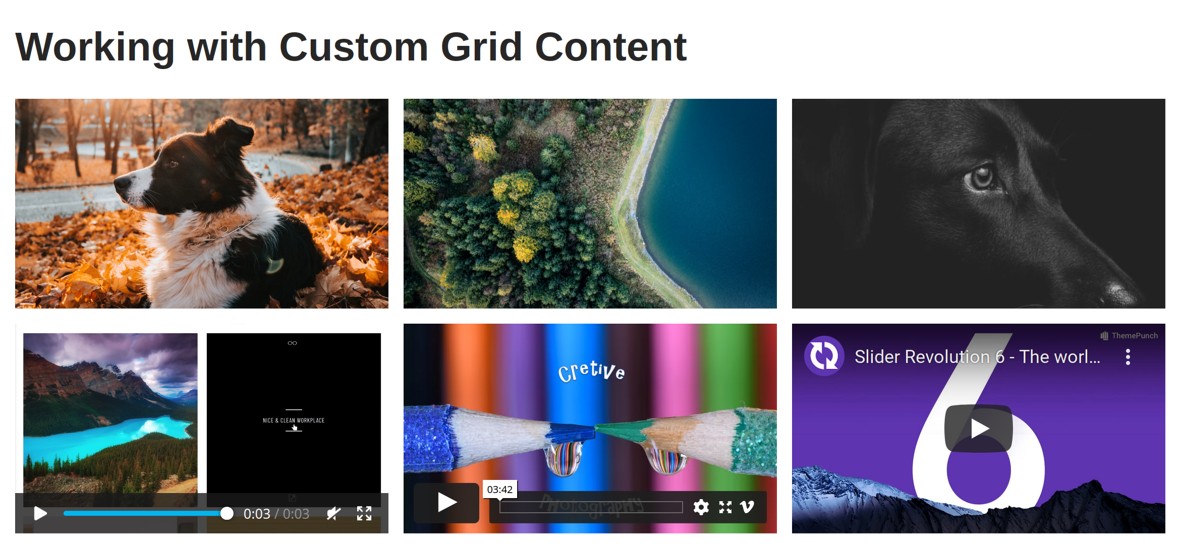
Your selection of images will be added to the grid:
Sound Cloud
The Sound Cloud item type allows you to add an individual SoundCloud track to your grid.
The process of adding a track is basically the same as adding a YouTube or Vimeo video, whereby you:
- Add a SoundCloud item
- Insert the ID of the track
- Ensure that you have the SoundCloud media source activated
However, finding a SoundCloud track ID is a little more tricky a process than with YouTube and Vimeo because it’s not made easily accessible. Here’s how to go about finding it.
First go to the web page of an individual track. This has to be the page of the track itself, not a playlist. Then click the Share button:

Switch into the Embed tab:
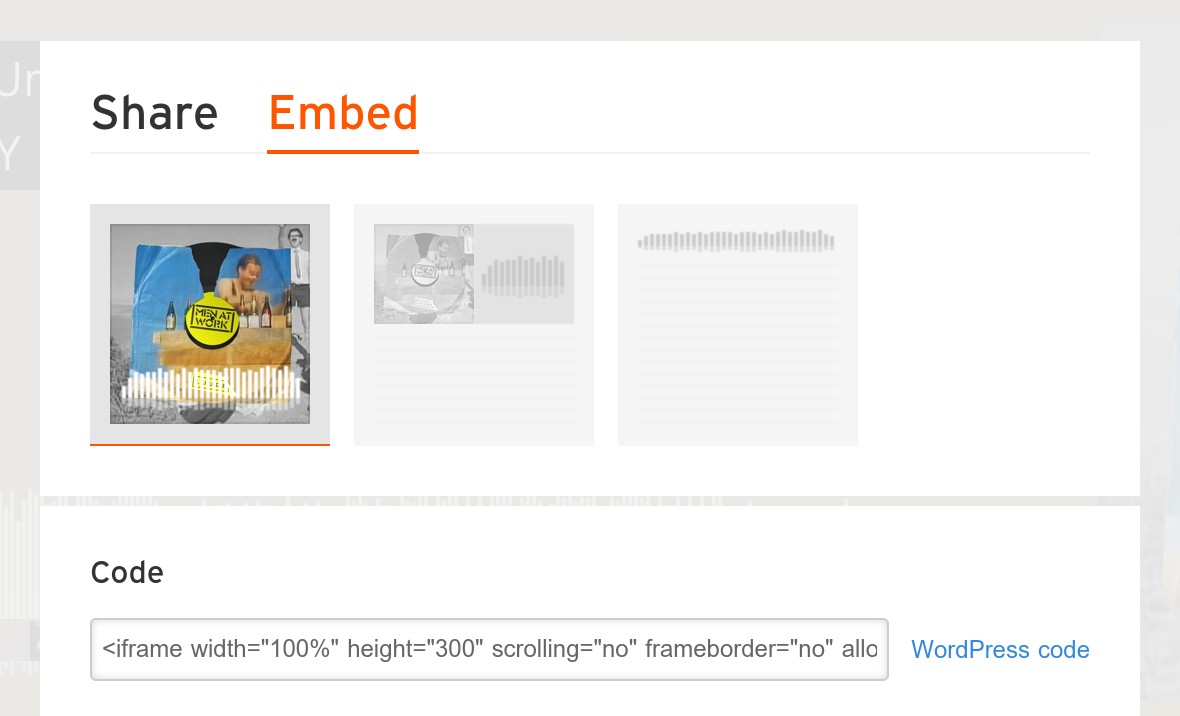
Copy the text from the Code field:

We’ll only need a small part of this text so paste it into a plain text editor like notepad to make everything easier to see:

A little ways into the text, look for the part that says src=” and find the URL that comes after that:

Look through that URL until you see the part that says /tracks/-:

The track ID is the number that comes immediately after that:

Copy all of the numbers, up to the ampersand, and you now have a SoundCloud ID ready to use.
Paste it into your SoundCloud item’s ID field, add the item, and you’ll see a SoundCloud track appear in your grid:

Simple Content
The Simple Content item type is a way to add an item to your grid that has no media at all. Instead it will just display whatever you have set as the default source image for your grid.
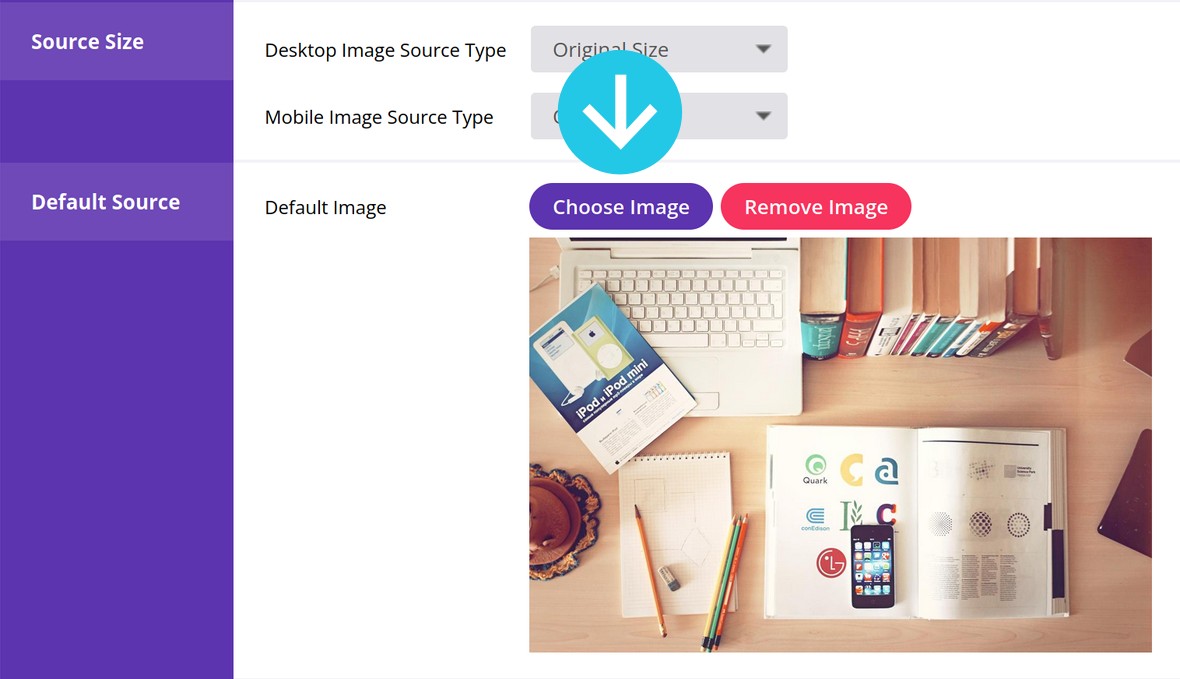
As such, it’s a good idea to set a default source image before you use the Simple Content item type.
This can be done by going to the Default Source panel and then, next to the Default Image option, clicking the Choose Image button and selecting a default image from your media library:
Once you’ve set a default image it will appear in any simple content grid item:
Blank Item
A Blank Item is a lot like a Simple Content, item however the main difference is that instead of showing the default image it will show nothing at all:
It effectively acts as a spacer inside your grid if you need to add a gap for design reasons.
Coming Next
We’ve now covered two of the three types of source content your grid can use.
In the next guide you’ll learn how to use the final type, Stream, to pull in content from third party social media sites.
