1. Setting Video ID’s / URL’s
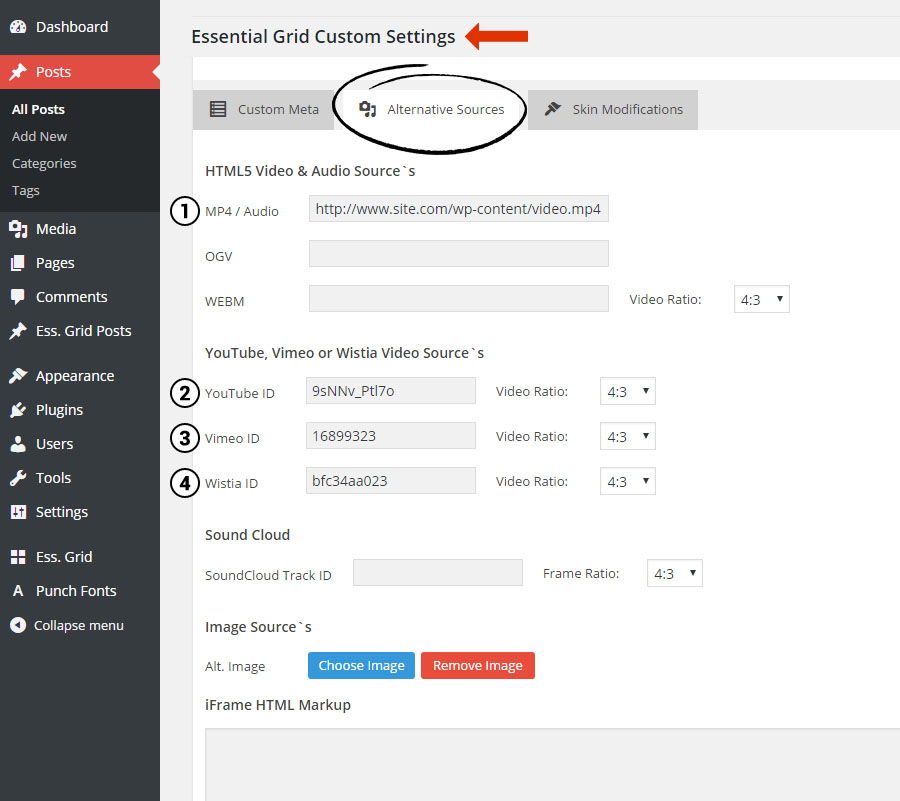
In order to use Video with Essential Grid, you first have to add your video ID’s and/or URL’s. All that’s needed for YouTube, Vimeo or Wistia is the video’s individual ID, and an absolute url is required for self-hosted HTML5 Video.
Special Note
This section is only applicable for Post-based Grids and Custom Grids.
For Special Video Stream Grids, continue on to sections #2-4.
1.1 Find your video’s ID / URL.
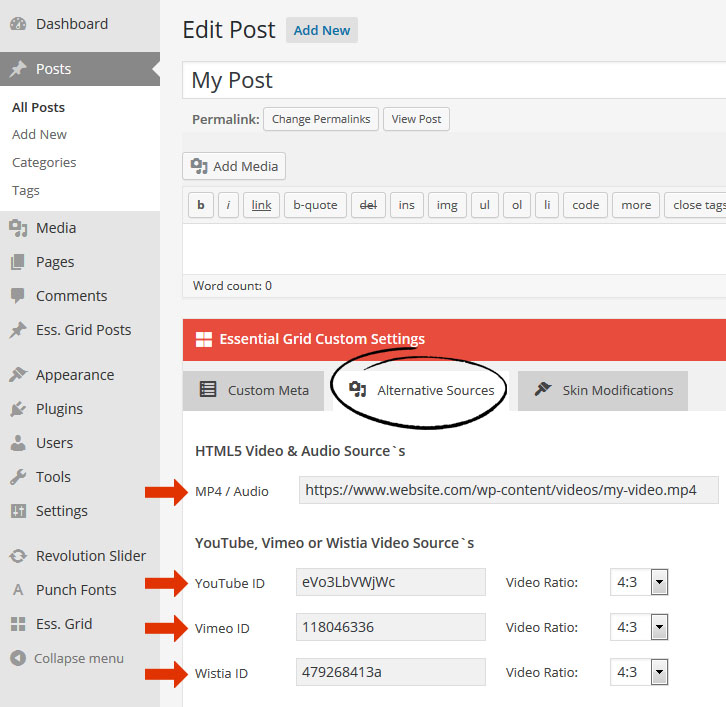
ID’s for YouTube, Vimeo and Wistia can be found in their respective video links:
YouTube ID = eVo3LbVWjWc
https://www.youtube.com/watch?v=eVo3LbVWjWc
Vimeo ID = 118046336
https://vimeo.com/118046336
Wistia ID = 479268413a
http://fast.wistia.net/embed/iframe/479268413a
For self-hosted HTML5 Video, upload an “mp4” version of your video to your website using your favorite ftp program, and then locate the absolute url to the video on your site:
HTML5 Video URL Example:
https://www.website.com/wp-content/videos/my-video.mp4
Special Note
HTML5 Video requires an “mp4” version of your video. If you need to convert your video to mp4 format, here’s an online tool you can use.
1.2 Enter your video’s ID/URL.
Where you enter your video’s ID/URL will depend on whether you’re using a post-based grid or a Custom Grid.
For a post-based grid, inside the post-editor, scroll to the “Essential Grid Custom Settings” section, and enter your video’s ID or url inside the “Alternative Sources” section:
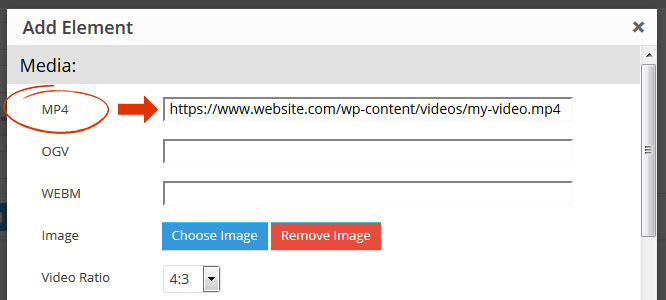
For a Custom Grid, inside the “Sources” section of your grid, scroll to the “Add Items” section, and select the video type you wish to add:
YouTube:


Vimeo:


HTML5 Video:

2. Play Video inside Grid Item
Video can be played directly inside a grid item. Visit the following demos to see examples of this.
- https://www.essential-grid.com/template_library/multimedia-gallery-for-wordpress/
- https://www.essential-grid.com/template_library/multimedia-blog-post-gallery-for-wordpress/
- https://www.essential-grid.com/template_library/hoover-masonry-wordpress-post-gallery-grid/
In the above examples, you’ll notice that all items have an image along with with a fancy hover skin that includes a “play” button/icon for the video.
This special hover-skin will only be shown if a “video poster image” has been added to the grid item, which can be a custom or designated “default” image of your choosing. Or, it can be the poster loaded directly from YouTube/Vimeo.com
To get started, from your Grid’s “Source” section, select the video sources you will be displaying inside your Grid Items.

Next, assign a poster image for your video source(s).
Quick Tip #1
Choose “No Image” if you’d rather not set a preview image for your videos. Just keep in mind that a preview image is required for the grid item to have a hover skin.
Quick Tip #2
Use the “Automatic Video Poster” option below for Special Video Stream Grids.
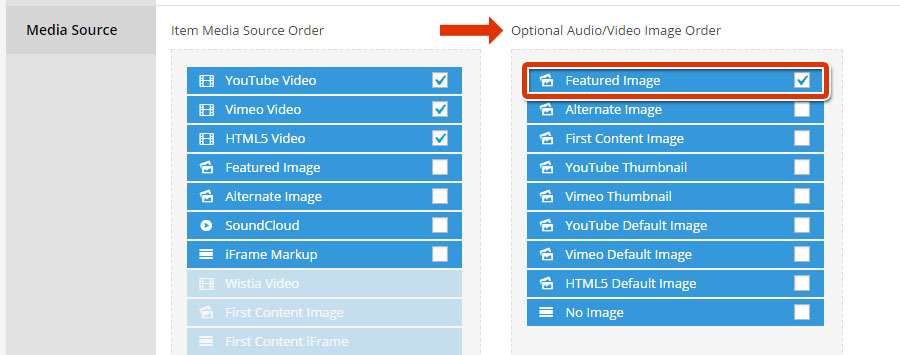
To add a custom preview/poster image for a post-based grid, first select one of the three options shown in the screenshot below, and then review #1-3 here for how these images can be officially attached to the Grid item.

To add a custom preview/poster image for a Custom Grid item, select “Featured Image” for the video poster source.
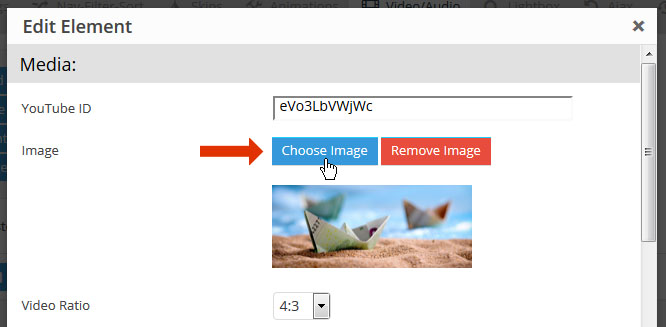
And then to add the poster images, scroll to the “Editor / Preview” section, click “Edit Element”, and then “Choose Image”.

Finally, visit the Skins tab, and select one of the following pre-built video skins:
- HowardTaft
- Herbet Hoover
- McKinley
Additional Note
Any skin can be used to play video inside a grid item.
The three skins listed above include a video play button/icon by default, but we can modify any of the additional skins to play video inside the grid item as well:
1. Select a Skin for your grid:

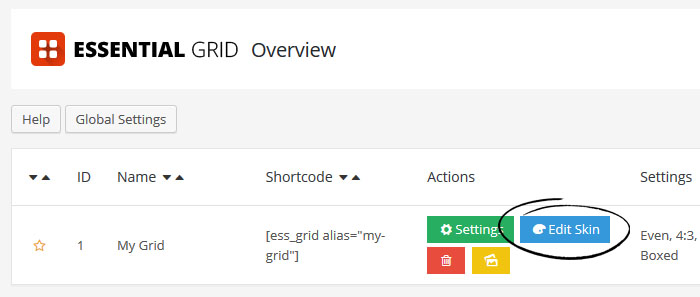
2. Edit the Skin:
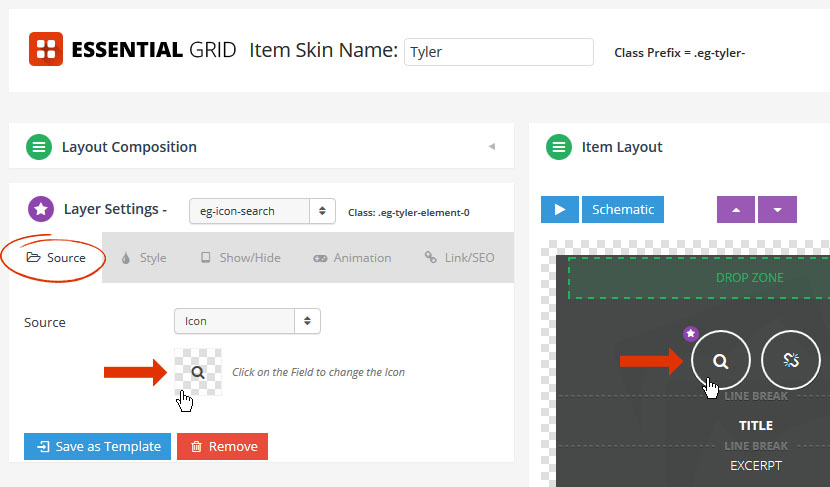
3. Select the element, and change the icon:
4. Choose one of the “play” button icons:

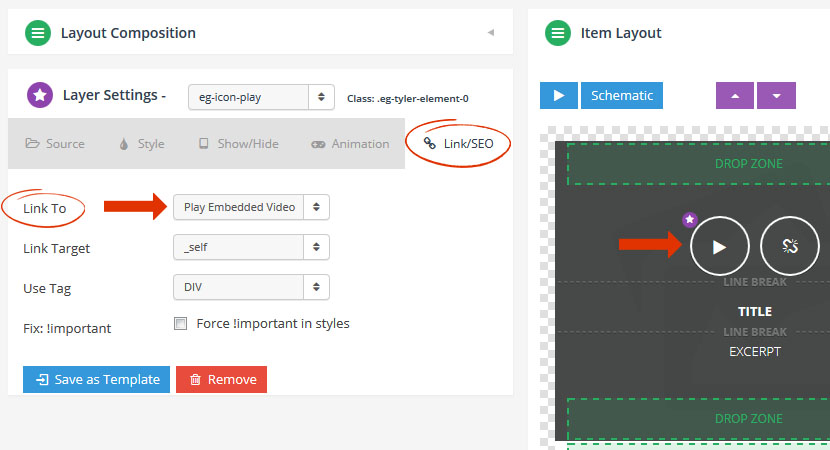
5. Set the icon element’s link to “Play Embedded Video”:
3. Play Video Inside Lightbox
The process for setting up video to play inside the lightbox is very similar to playing video inside the grid item itself, in that both a video ID/url and also an image will need to be added to the grid item.
Setting up video ID’s/urls’s and images for grid items will vary based on whether you’re using a Post-based Grid or a Custom Grid. Review the previous sections in this article for information about both processes.
Once you’ve setup your grid items to include both a video ID/url and also an image, follow the steps listed below to load the video inside the lightbox:
3.1 Set main media source to one of the “image” options.
For a post-based grid, you can choose one of the three options listed in the screenshot below.
For a Custom Grid, always choose “Featured Image” (#1 below).

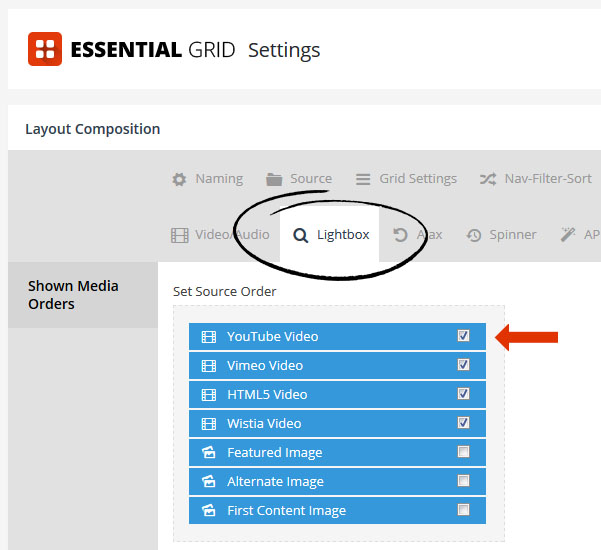
3.2 From the “lightbox” section, select the video sources you’re working with.
Special Note
Options in the “Video/Audio” section are only applicable for playing video inside the grid item itself. When loading video inside the lightbox, these options are not needed.
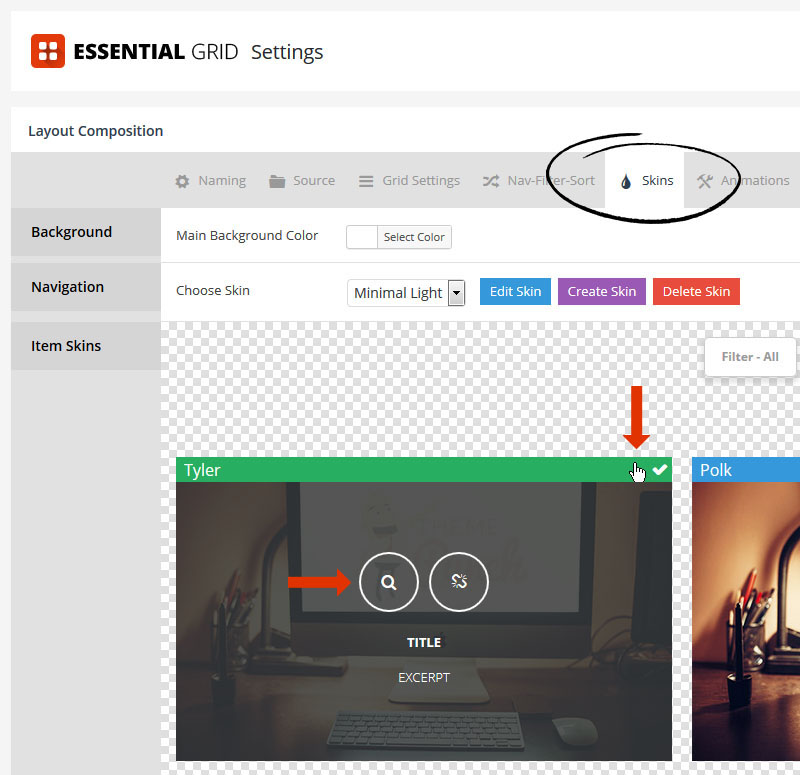
3.3 Choose a skin
Most skins include a magnifying glass icon, that’s automatically connected to the lightbox by default.
Additional Note
Any skin be used to play video inside the lightbox.
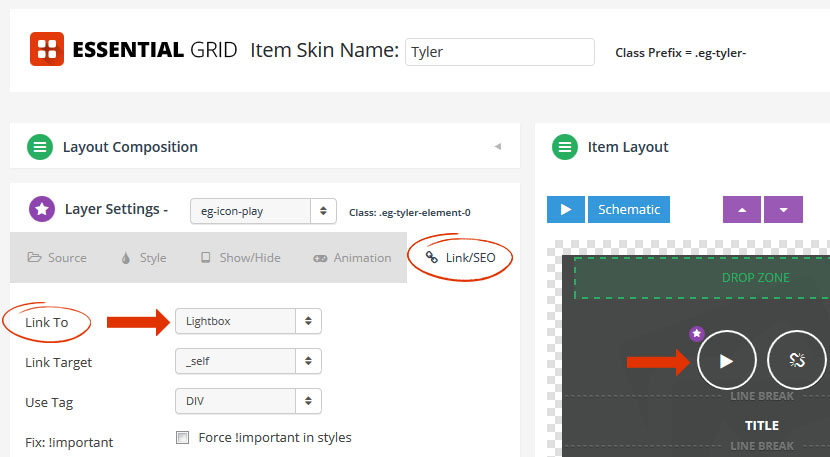
To change the icon from a magnifying glass to a play button, follow steps #1-4 here. Then for step #5, set the “Link To” option to “Lightbox”:
4. Play Video Inside Ajax Container
Essential Grid has a special feature where content can be loaded dynamically above or below the grid. To illustrate this, here’s a view of a sample grid:

And here’s the same grid with a video loaded as the Ajax content:
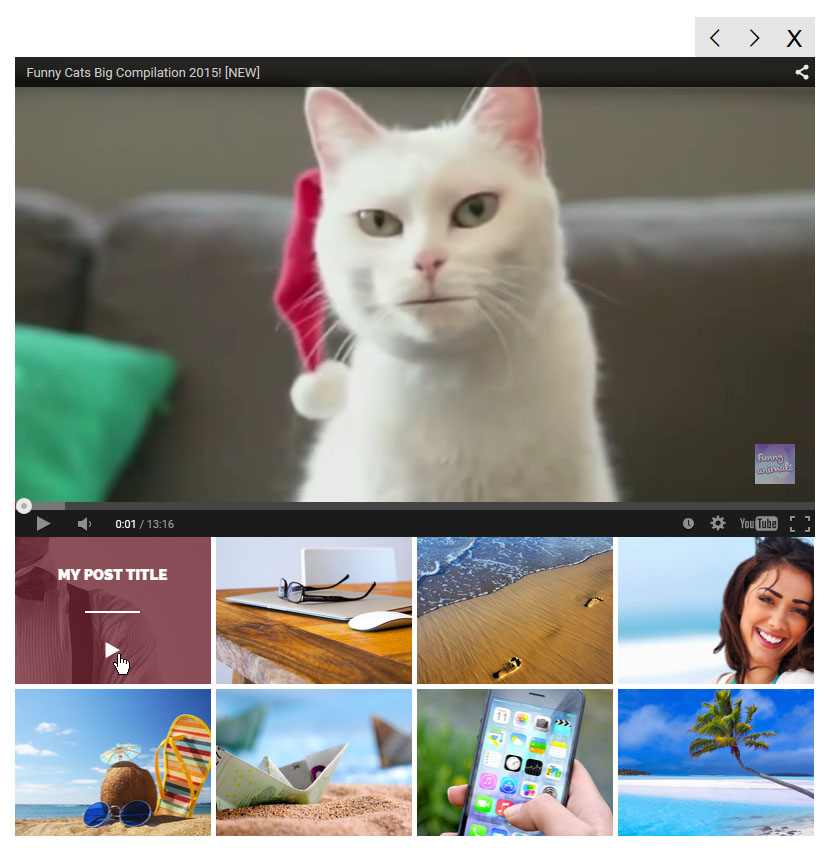
Special Note
The setup for this is almost identical to setting up the lightbox option, with the following differences:
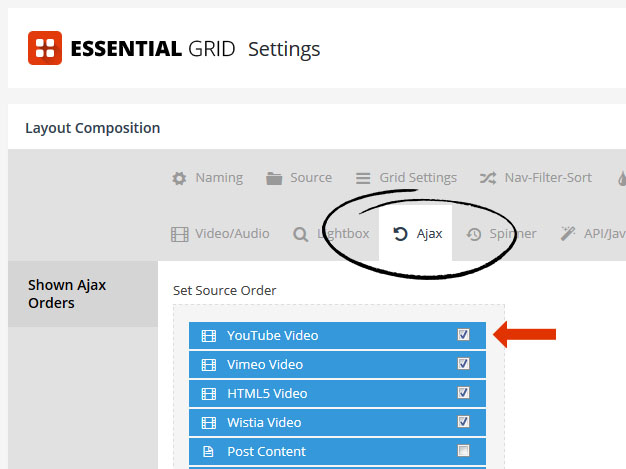
4.1 When playing video inside the lightbox, the video sources are set in the Lightbox tab. But when displaying video in the Ajax container, the sources are set in the “Ajax” tab instead:
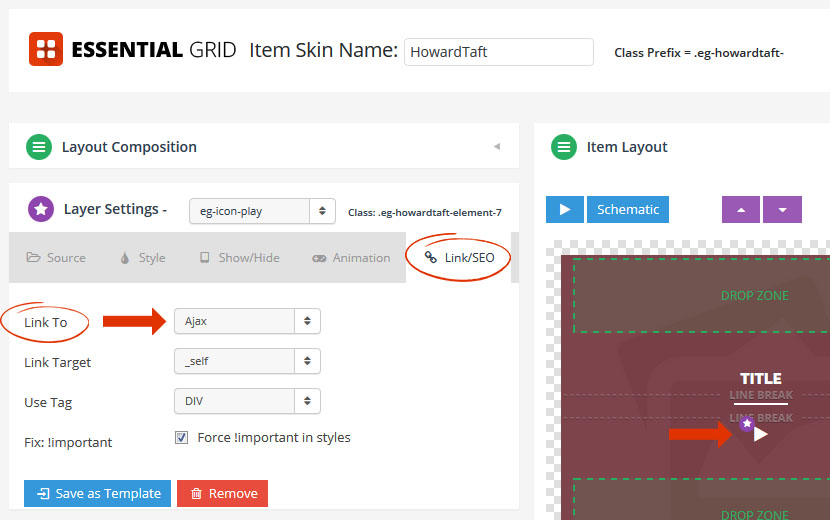
4.2 Then the button/icon is hyperlinked to “Ajax”:
4.3 You can choose to load the video above or below the grid:

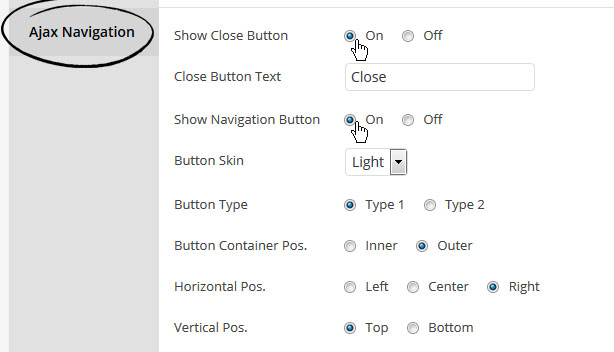
4.4 And also choose to display left/right navigation arrows, as well as a “close container” button:
