Find the font you wish to use from fonts.google.com, and click the “+” icon.

Next, select the black bar toward the bottom of the page to view the font’s details.

And then copy the bold text as shown in the following screenshot. This is the font’s official “Parameter”.

Next, from the “PunchFonts” page, choose “Add New Font”.

Then give the font a “handle”, paste in your Google Font’s official “Parameter”, and finally, select “Add New Font”.
The “Handle” can be anything, but the “Parameter” must match what was copied from fonts.google.com

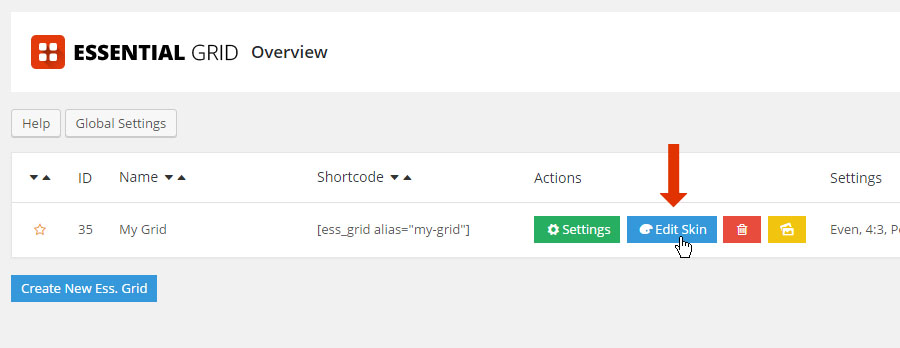
Next, from the plugin’s main admin page, choose “Edit Skin”.
Finally, select a Text Element from your Skin and apply the new Google Font.

Google Fonts

